Proper ear cleaning is an important part of your dog’s grooming routine. Regular cleaning can help prevent ear infections and keep your dog’s ears healthy. Here’s a step-by-step guide on how to clean your dog’s ears safely and effectively.
Gather the necessary supplies
In order to properly clean your dog’s ears, it is important to gather all the necessary supplies beforehand. By having everything prepared, you can ensure a smooth and effective ear cleaning process.
Cotton balls or pads
The first item you will need is a supply of cotton balls or pads. These are essential for gently removing any dirt, debris, or excess ear cleaning solution from your dog’s ears. Make sure to choose a brand that is soft and safe for use on your dog’s delicate ears.
Ear cleaning solution recommended by your veterinarian
Next, you will need an ear cleaning solution that is recommended by your veterinarian. It is important to use a solution specifically designed for dogs as human ear cleaning products may not be safe or effective for canine ears. Your veterinarian can provide guidance on the best ear cleaning solution for your dog’s specific needs.
Note: If your dog has a history of ear infections or other ear issues, your veterinarian may prescribe a specially formulated ear cleaning solution to address those specific conditions.
Treats or rewards for your dog
Lastly, it is helpful to have some treats or rewards on hand during the ear cleaning process. Cleaning your dog’s ears can be a potentially uncomfortable or stressful experience for them, so offering treats as positive reinforcement can help make the process more enjoyable for your furry friend. Choose small, easily digestible treats that your dog loves.
Remember: The treats should be used as a reward for good behavior during the ear cleaning process, not as a distraction or bribery.
By gathering these essential supplies beforehand, you can ensure that you have everything you need to properly clean your dog’s ears. This will not only make the process more efficient but also more comfortable and enjoyable for both you and your furry friend.
Prepare your dog
Choose a quiet and comfortable area for the cleaning
When it comes to grooming your dog, it’s important to choose a quiet and comfortable area where they will feel relaxed and at ease. This will make the whole process much easier for both you and your furry friend. Look for a space in your home where there are minimal distractions and noise. It could be a dedicated grooming area or a corner of a room where your dog feels secure.
Tip:If your dog tends to be nervous or anxious during grooming sessions, consider setting up their grooming area near a window with a view. This can provide a calming distraction and help them feel more at ease.
Have someone assist you if your dog is anxious or uncooperative
If your dog is particularly anxious or uncooperative when it comes to grooming, it can be helpful to have an extra set of hands to assist you. This could be a family member or a friend who is comfortable with dogs. Having someone there to help hold your dog or distract them with treats can make the process go much smoother.
Tip: Make sure the person assisting you is familiar with your dog and knows how to handle them safely. It’s important to prioritize your dog’s comfort and well-being throughout the grooming process.
Give your dog some treats or rewards to create a positive association
Grooming can sometimes be a stressful experience for dogs, so it’s important to create a positive association with the activity. One way to do this is by giving your dog treats or rewards during and after the grooming session. This will help them associate grooming with something positive and enjoyable.
Tip: Choose high-value treats that your dog loves, such as small pieces of cooked chicken or cheese. You can also use special grooming rewards, like dental chews or puzzle toys filled with treats, to keep your dog entertained and motivated during the grooming process.
By choosing a quiet and comfortable area for grooming, having someone assist you if needed, and offering treats or rewards, you can help prepare your dog for a successful and stress-free grooming experience.
Inspect the ears
Regularly inspecting your pet’s ears is an important part of their overall health and well-being. By conducting routine checks, you can catch any potential issues early on and address them before they become more serious. Here is a step-by-step guide on how to inspect your pet’s ears:
1. Check for any signs of redness, swelling, discharge, or foul odor
Start by gently lifting your pet’s ear flap and visually examining the ear canal. Look for any signs of redness, swelling, discharge, or foul odor. These could indicate an infection or inflammation. If you notice any of these abnormalities, it is crucial to consult your veterinarian for further evaluation and treatment.
2. Look for excessive earwax or debris
Next, observe the ear canal for excessive earwax or debris. Some amount of earwax is normal, as it helps lubricate and protect the ears. However, an excessive buildup of wax or debris can lead to blockage and increase the risk of infection. If you notice an abnormal amount of earwax or debris, it is recommended to seek professional guidance from your veterinarian.
3. If you notice any abnormalities, consult your veterinarian before proceeding
If during the inspection, you notice any abnormalities such as redness, swelling, discharge, or excessive earwax, it is important to consult your veterinarian before attempting any further actions. Your veterinarian will be able to assess the situation accurately and provide appropriate guidance or treatment.
Remember, your pet’s ears are delicate and sensitive. It is crucial to handle them with care during the inspection process. Avoid using any sharp objects or inserting anything into the ear canal without proper professional guidance. Your veterinarian is your best resource when it comes to addressing any ear-related concerns.
By following these steps and conducting regular ear inspections, you can ensure that your pet’s ears remain healthy and free from any potential issues. Remember that early detection and intervention are key to maintaining your pet’s overall well-being.
Apply the ear cleaning solution
Ear cleaning is an important part of maintaining the overall health and hygiene of your dog. It helps prevent infections and discomfort caused by excess wax and debris in the ears. By following a few simple steps, you can effectively clean your dog’s ears using an ear cleaning solution.
Follow the instructions on the ear cleaning solution bottle
Before using any ear cleaning solution, it is crucial to carefully read and follow the instructions provided on the bottle. Each ear cleaning solution may have specific directions for usage, so it’s essential to understand them before starting the cleaning process.
Gently lift your dog’s ear flap and fill the ear canal with the solution
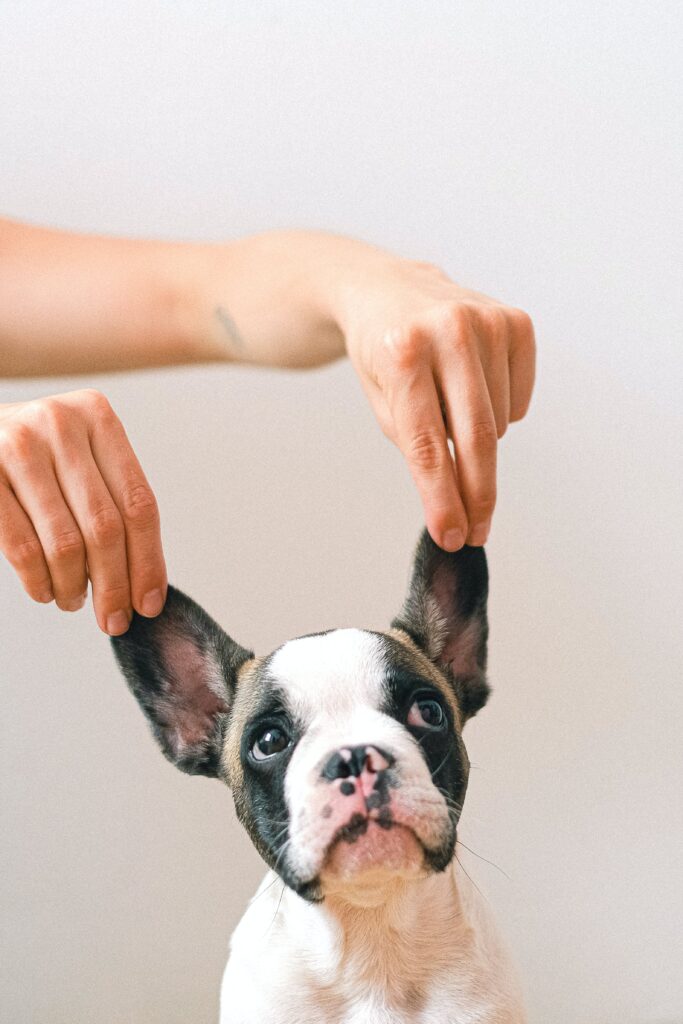
To begin the cleaning process, gently lift your dog’s ear flap and hold it in an upright position. This will expose the ear canal and allow you to easily access it. Take the ear cleaning solution and carefully pour it into the ear canal as directed by the instructions on the bottle. Ensure not to overfill the ear canal to avoid discomfort for your dog.
Massage the base of the ear for about 30 seconds to loosen any debris
After filling the ear canal with the solution, gently massage the base of the ear for about 30 seconds. This massage helps to distribute the solution throughout the ear canal and loosen any built-up debris or wax. Be gentle while massaging to avoid causing any pain or discomfort to your dog. Massaging also helps to soothe your dog and make the cleaning process more comfortable for them.
Once you have completed these steps, you can release the ear flap, and your dog may shake their head to remove any excess solution. Use a clean cotton ball or cloth to gently wipe away any remaining solution, wax, or debris that comes to the outer part of the ear. It is crucial to avoid using cotton swabs or inserting anything into the ear canal as it can cause damage.
Regular ear cleaning is necessary for dogs, especially those with floppy ears or a history of ear problems. However, it is advisable to consult with your veterinarian before starting any ear cleaning routine, especially if your dog has a history of ear infections or other ear-related issues. With proper care and attention, you can maintain your dog’s ear health and prevent any discomfort or complications.
Clean the ears
In order to maintain good ear hygiene and prevent ear infections, it is important to clean the ears properly. Cleaning the ears should be done carefully and gently to avoid any injuries or damage to the ear canal. Here is a step-by-step guide on how to clean the ears effectively.
1. Take a cotton ball or pad
Start by gathering a clean cotton ball or pad. Ensure that the cotton is soft and free from any loose fibers or contaminants. The use of cotton balls is recommended as they are gentle on the ear and can easily absorb any earwax or debris.
2. Gently wipe the visible part of the ear canal
Use the cotton ball or pad to gently wipe the visible part of the ear canal. It is important to only clean the outer part of the ear canal and avoid inserting anything deep into the ear. This helps to remove any dirt, earwax, or excess moisture that may have accumulated.
3. Avoid inserting anything deep into the ear canal
It is crucial to avoid using any objects, such as cotton swabs or hairpins, to clean the ear canal. Inserting anything deep into the ear canal can push the wax further inside, leading to blockages and potential damage to the eardrum. Stick to cleaning the outer part of the ear canal only.
4. Repeat the process with clean cotton balls
After cleaning the visible part of the ear canal, discard the used cotton ball or pad. Take a fresh one and repeat the process until the cotton ball comes out clean. This ensures that all the accumulated earwax and debris are properly removed, leaving the ears clean and healthy.
Remember, cleaning the ears should be done gently and cautiously. If you experience any pain, discomfort, or notice any unusual symptoms, it is advisable to consult a healthcare professional.
Reward your dog
Praise and reward your dog with treats for cooperating during the process:
One of the most effective ways to encourage your dog to cooperate during ear cleaning is to reward them with treats. Dogs respond well to positive reinforcement, and by praising and giving treats, you can make the experience more enjoyable for them. Before starting the ear cleaning process, have a few small treats on hand to give to your dog throughout the procedure.
Make the experience positive to encourage future ear cleanings:
The key to successful ear cleanings is to create a positive experience for your dog. If they associate ear cleanings with discomfort or negative experiences, they may become resistant in the future. To make the experience positive, be gentle and patient with your dog. Speak to them in a reassuring tone and offer extra praise and treats during and after the cleaning. This will help build a positive association with ear cleanings, making future sessions easier.
Allow your dog to shake their head to remove any excess solution:
After applying the ear cleaning solution, allow your dog to shake their head. Shaking their head helps to remove any excess solution and loosens up debris that may be stuck in their ears. It’s important to let them do this before using a cotton ball or tissue to wipe away any remaining solution. This natural shaking motion is beneficial for their ears and helps to optimize the cleaning process.
Conclusion
Rewarding your dog during the ear cleaning process is essential to make it a positive and enjoyable experience for them. By offering treats and praise, you can encourage them to cooperate and build a positive association with ear cleanings. Additionally, allowing your dog to shake their head helps to remove any excess solution and debris, ensuring a thorough cleaning. Remember, a positive experience will make future ear cleanings easier and less stressful for both you and your furry friend.
Repeat as necessary
When it comes to maintaining your dog’s overall health and hygiene, ear cleaning should not be overlooked. Just like humans, dogs can accumulate dirt, wax, and debris in their ears, which can lead to discomfort and even infections. The frequency of ear cleaning, however, depends on your dog’s breed and individual needs. Here’s a step-by-step guide on how to clean your dog’s ears effectively and safely.
Step 1: Consult your veterinarian
Before starting any ear cleaning regimen, it’s essential to consult with your veterinarian. They can provide you with specific recommendations based on your dog’s breed, age, and any existing conditions. Some dogs may have a higher predisposition to ear infections, while others may require more frequent cleanings.
Step 2: Gather the necessary supplies
To clean your dog’s ears, you’ll need the following supplies:
- Ear cleaning solution (specifically formulated for dogs)
- Cotton balls or gauze pads
- Cotton-tipped applicators (optional)
- Treats (to reward your dog during and after the process)
Step 3: Start the cleaning process
Begin by gently restraining your dog, ensuring they are comfortable and calm. Follow these steps:
- Hold the ear flap and lift it slightly, exposing the ear canal.
- Gently pour a small amount of the ear cleaning solution into the canal. Be careful not to force it.
- Massage the base of the ear for about 20 to 30 seconds. This will help distribute the solution and loosen any debris.
- Allow your dog to shake their head. This will help dislodge any loosened debris.
- Use a cotton ball or gauze pad to gently wipe away the excess solution and debris from the ear canal.
- For hard-to-reach areas, you can use a cotton-tipped applicator, but be cautious not to insert it too deeply.
Step 4: Regularly monitor your dog’s ears
After the cleaning process, it’s important to regularly monitor your dog’s ears for any signs of infection or discomfort. Keep an eye out for the following:
- Redness or swelling
- Excessive scratching or head shaking
- Unpleasant odor
- Discharge
- Pain or sensitivity
If you notice any of these signs, it’s crucial to contact your veterinarian as soon as possible for a proper diagnosis and treatment.
In conclusion, the frequency of ear cleaning for your dog will vary depending on their breed and individual needs. Consulting with your veterinarian, gathering the necessary supplies, and following the step-by-step cleaning process will help keep your dog’s ears healthy and free from infection. Remember to regularly monitor your dog’s ears and seek professional guidance if any concerns arise. By dedicating time and attention to your dog’s ear hygiene, you’ll contribute to their overall well-being and ensure they live a comfortable and happy life.
Conclusion
Regularly cleaning your dog’s ears is essential for their overall health. By following these steps and seeking veterinary guidance when needed, you can ensure your dog’s ears stay clean and problem-free. Remember to make the experience positive and rewarding for your furry friend.
TL;DR
Cleaning your dog’s ears is important for their health. Follow these steps and seek veterinary help when needed to keep their ears clean and problem-free. Make sure to make the experience positive for your pet.


